
Vanilla Velvet Cake
This recipe was provided by superstar baker, Katherine Sabbath, who demonstrated at the 2018 Cake Bake & Sweets Show.
Vanilla Velvet Cake
Ingredients:
- 2 3/4 cups (350g) self-raising cake flour
- ½ teaspoon baking soda
- 1/2 teaspoon sea salt flakes
- 1 1/4 cup caster sugar
- 1 cup vegetable oil
- 2 teaspoons vanilla extract or 1 teaspoon vanilla bean paste
- 3 large free-range eggs (for the whitest cake, substitute for 4 egg whites)
- 1½ cups buttermilk
Method:
- Preheat oven to 160°C, fan-forced. Grease a 9-inch oven-proof glass bowl (I used a Pyrex glass bowl) with butter or cooking oil spray.
- Sift together flour, baking soda, baking powder, salt and sugar. Set aside.
- In the bowl of a kitchen mixer whisk together the vegetable oil and vanilla. Whisk in the eggs, one at a time, until frothed.
- Gently incorporate the dry ingredients in three divisions, alternating with two divisions of the buttermilk. Mix until just combined, being careful not to over-mix.
- Pour mixture into prepared glass bowl and bake for about 40-45 minutes or until a wooden skewer inserted into the centre comes out clean. Stand cake in bowl for 1 hour, before turning onto wire rack (top-side down) to cool completely. Trim bottom to level, if needed. Cover with cling wrap or a clean, damp tea towel and set aside until assembly.
TIP: This cake can be made 1-2 days in advance and kept in an airtight container or plastic wrap. It can also be frozen (wrapped in multiple layers of plastic wrap) for up to 3 weeks.
Vanilla Bean ‘Swiss’ Meringue Buttercream
- 1 1/2 cups caster sugar
- 8 large free-range egg whites (or you could use pasteurised carton egg whites to make life easier)
- 500 grams unsalted butter, softened to a spreadable consistency
- 1 teaspoon vanilla bean paste
- Gel food colouring (I used sky blue)
Method:
- Place sugar and egg whites in a heat-proof glass bowl. Set bowl over a pan of gently simmering water, and whisk until sugar has dissolved and egg whites are slightly warm to the touch.
TIP: You can omit this step if you are using pasteurised egg whites and instead, simply place sugar and egg whites directly into mixer!
- Transfer mixture into the bowl of a kitchen mixer. Using the whisk attachment, beat on high speed until mixture has formed stiff and glossy peaks.
- Add the butter, in thirds, and whip until incorporated after each addition. Don’t be alarmed if the buttercream appears curdled, as it will become light and fluffy again with continued whipping (I absolutely promise!). Add vanilla bean paste and whip until fluffy.
- Add food colouring until a desired colour is achieved. For a smoother meringue buttercream with less air bubbles, whip with on the lowest setting for a further 5 minutes. Cover bowl with plastic wrap, and set aside at room temperature in a cool environment until needed.
TIP: Meringue buttercream can be made ahead of time and refrigerated for up to 2 weeks. Simply bring to room temperature when needed, or gently heat in the microwave at 10 second intervals, mixing in between.
Cake Assembly & Decoration
- 100g white fondant
- 100g light blue fondant
- 20g black fondant
- 20g pink fondant
- Corn flour for dusting
- 1 x wooden skewer and small foam cake dummy
- 1 x large mermaid tail silicone mould
- Florist wire (or you could use toothpicks)
- Small circular cookie cutters (mine were 4cm and 6cm in diameter)
- Edible gold paint (or you can use edible gold dust mixed into a paste using cake decorator’s rose spirit)
Method:
- To make unicorn horn, insert a wooden skewer into a foam cake dummy, which will help you decide how tall to make the horn. Roll out 2 tapered ropes of white Twist the tapered ropes together to form a unicorn horn and gently press the horn down onto the skewer. Allow to dry completely before painting with edible gold paint.
- To make tail, dust mermaid tail mould with corn flour and use a rolling pin to gently press blue fondant into mould, trimming the outside edges if needed. Place in freezer for 15 minutes or until firm. Fondant tail should easily release from mould.
- To make Narwhal’s water droplets, roll blue fondant into small balls of different sizes and taper each at one side. Gently flatten each one to form a tear drop shape. Insert florist wire or toothpick.
- To frost cake: Place a dollop of buttercream onto a cake board or large serving plate and place the cake on top (this should prevent your cake from sliding around!). Place a cake turntable underneath (which makes frosting so much easier). Use an offset spatula to crumb coat cake with buttercream. Place in refrigerator for 15 minutes or until firm.
- Apply a final coat of buttercream all over crumb coat layer, smoothing with a small cake scraper or small flexible piece of plastic.
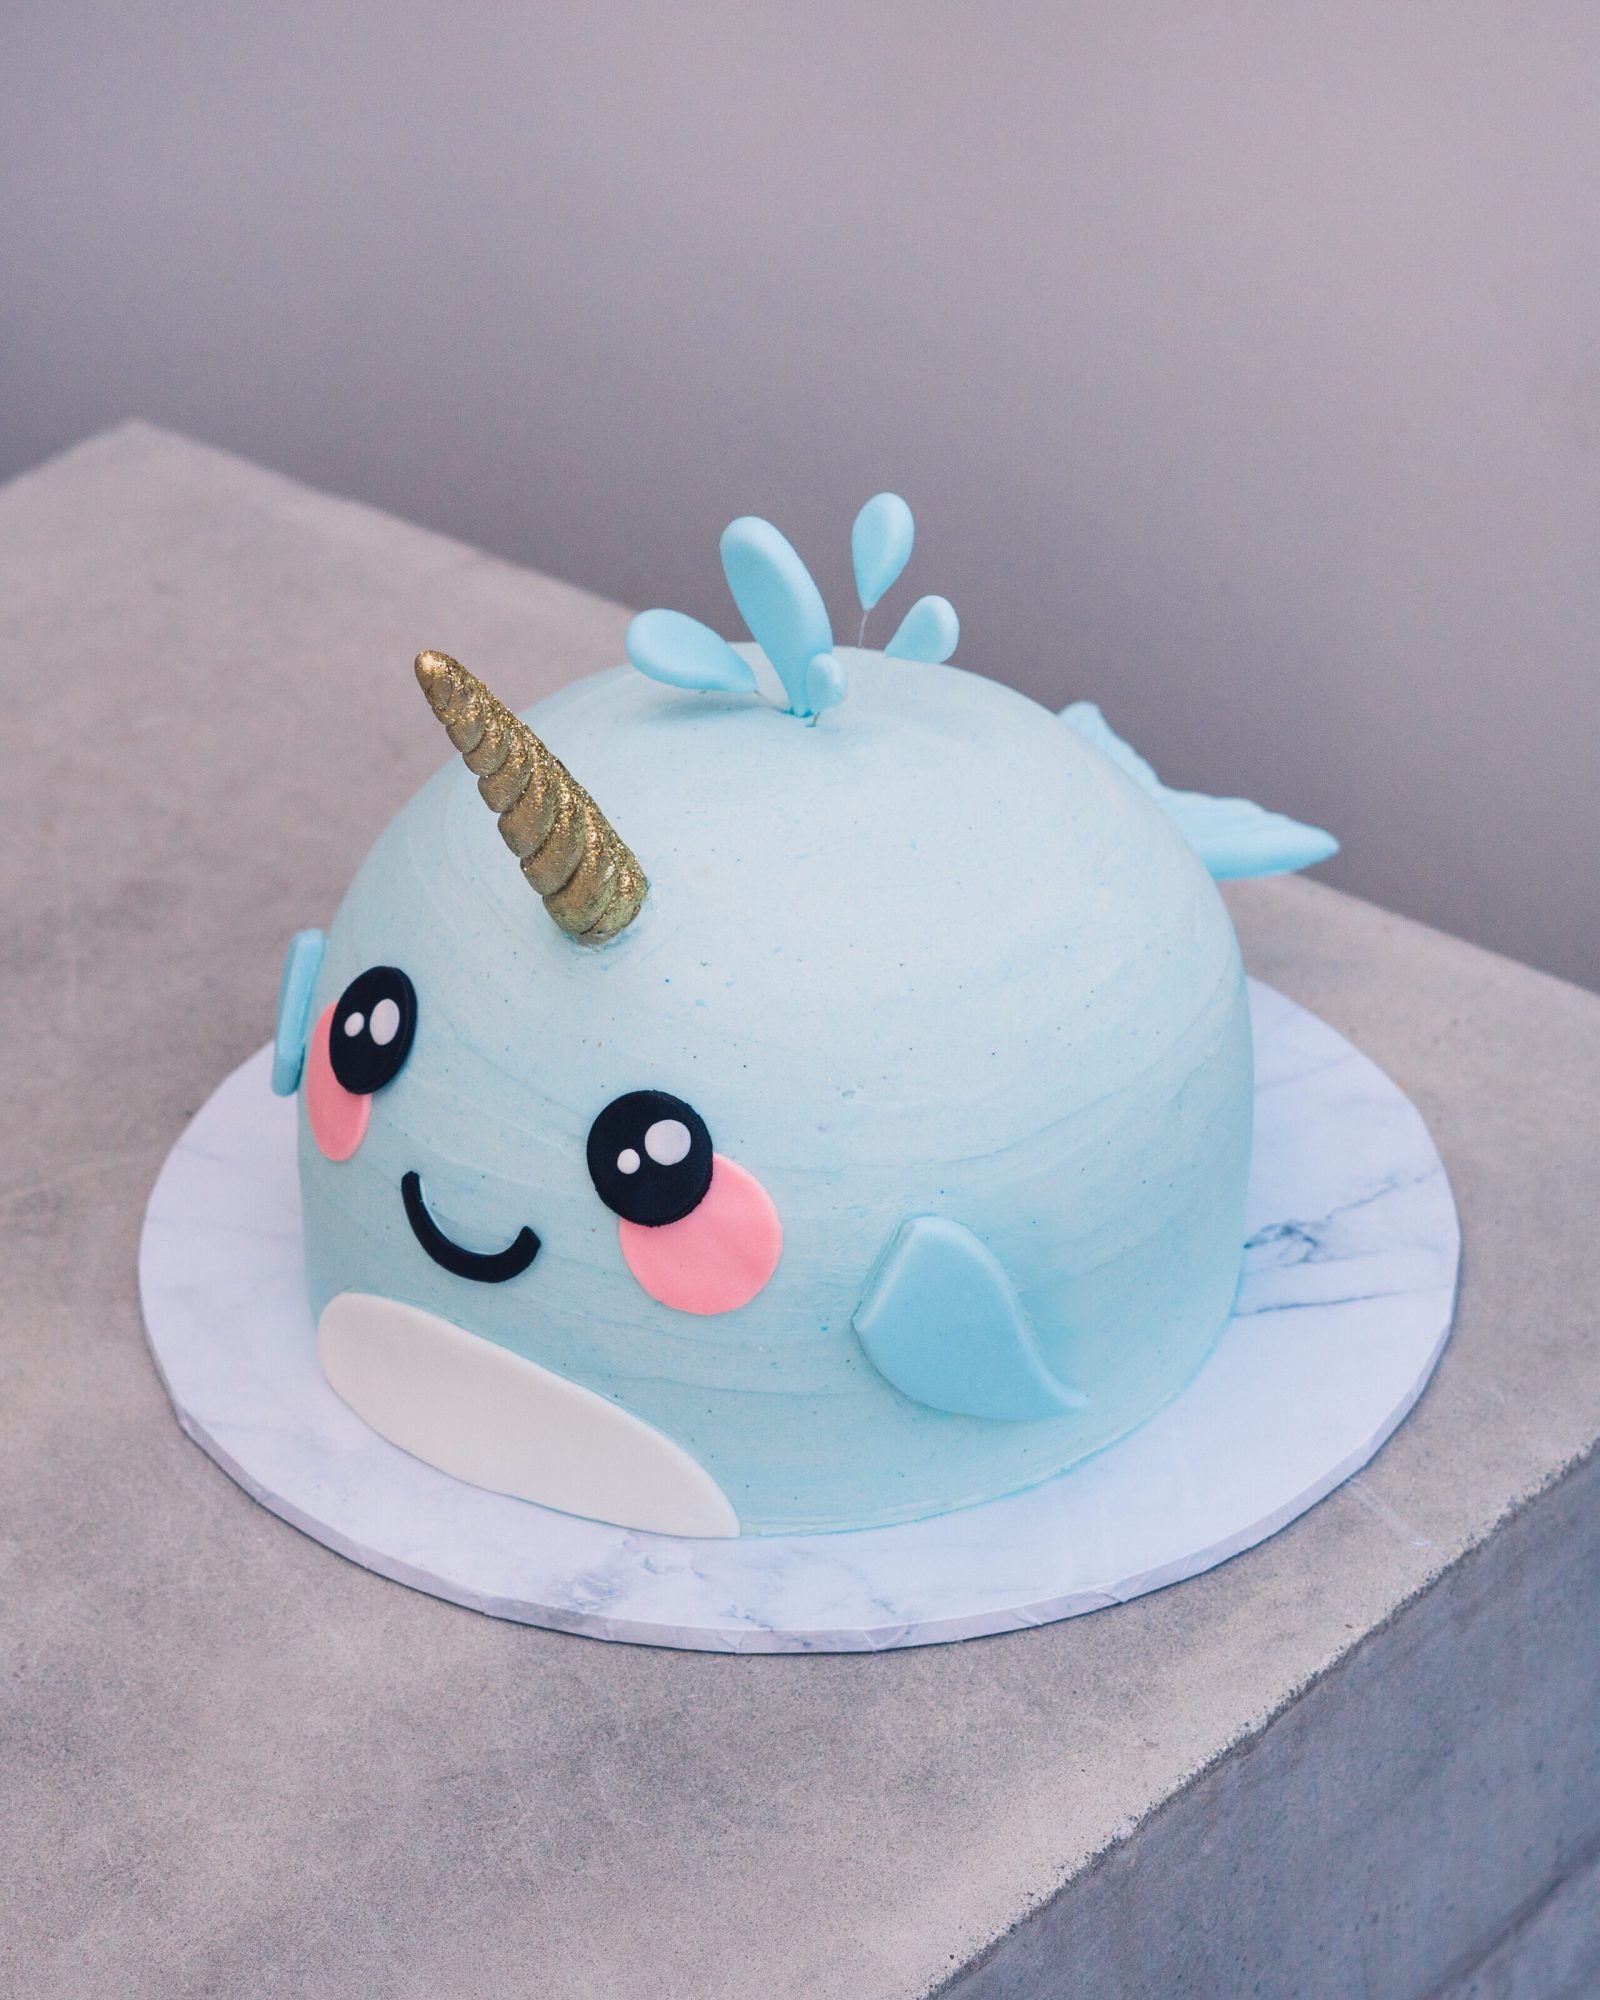
- Roll out some white fondant and use a small knife to cut out the white section of narwhal’s chest. Gently place onto cake. To make the eyes, roll out black and pink fondant and cut to size using circular cutters. Place onto cake. Form the whites of the eyes by rolling small balls of white fondant and gently pressing flat. Use a small amount of water or sugar glue to place the whites onto eyes.
- To make mouth, roll out a small amount of black fondant and use a circular cookie cutter to cut out a thin crescent shape. Place onto cake. To make fins, roll out blue fondant and use a small knife to cut 2 x fin-like shapes (feel free to use your creativity here, as they do not need to look like mine – which I made up anyway!).
- Finally, carefully place tail, unicorn horn, and water drops into cake – and TA-DA! It’s the cutest narwhal cake!
This cake is best enjoyed when served at room temperature. Will keep refrigerated for up to 4 days but please note, depending on your refrigerator, fondant decorations may soften.